A 360° Workflow is a customizable framework for managing the 360° assessment process. It allows you to define evaluator roles, select participants, schedule reminder emails, and control when and how reports are delivered. A single 360° assessment can be used across multiple workflows, each with its own specific roles and delivery settings.
Create a 360° Workflow #
There are 4 steps to the 360° Assessment Lifecycle:

We’ll focus here on creating your 360° Workflow.
To get started, click “Distribute 360°” from the Actions menu or hover over your assessment name and click “Distribute 360°”.

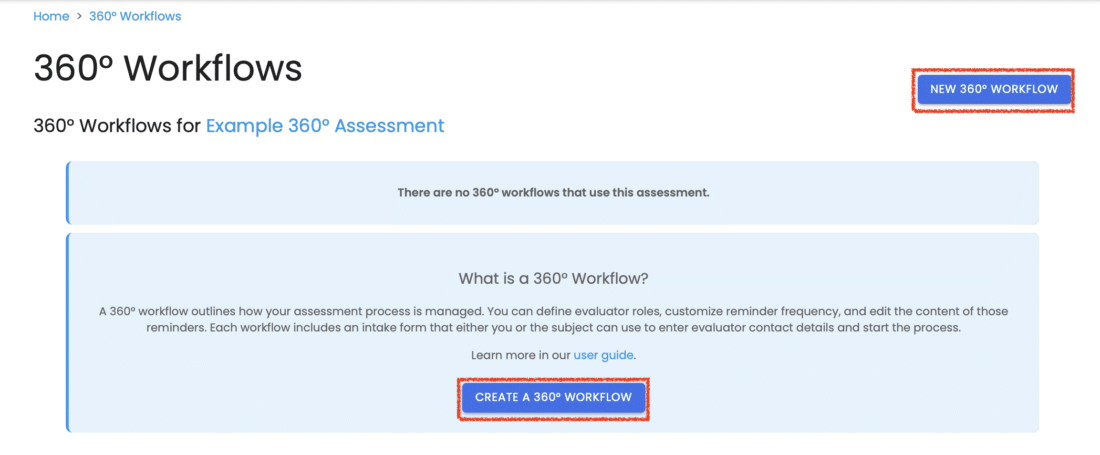
This will take you to a page listing all the workflows associated with your current 360° Assessment.
To create a new workflow, click the “New 360° Workflow” button or “Create a 360° Workflow” button. If you’d prefer to make changes to an existing one, just hover over its name and click “Edit.”
Workflow Settings and Test Mode #
Workflow Name and Associated Assessment #
Under Settings, enter a name for your workflow and select the 360° Assessment it will be linked to.

Next, decide whether to enable Test Mode. Test Mode allows you to preview your 360° assessment with shortened timelines—reminders and report delivery intervals are measured in hours rather than days—making it easier to quickly test the full experience.
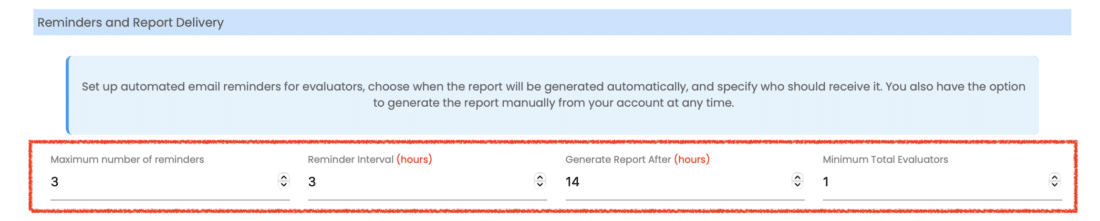
Reminders and Report Delivery #
Set up your automation preferences:
- Schedule the Maximum number of email reminders to evaluators
- Choose when the 360° report should be generated automatically under Reminder Interval
- Choose how many days (or hours in test mode) after assessment distribution to automatically Generate the Report (You can also manually generate the report from your account at any time)
- The Minimum Total Evaluators that must be provided for each subject, across all roles. For example, if your workflow has three different roles you might want to require at least one evaluator in each role, but five evaluators total. That means that your subject must provide two additional evaluators in the role(s) of their choice – they could add additional peers or direct reports, for example. To get started, leave this value set to 1 and only increase it if you require this behavior.
360° Report Destinations #
In the 360° Report Destinations section, you can enable or disable automatic delivery of the report to:
- The Subject
- The Agolix account holder
- Other specified email addresses

Email Message for 360° Report Delivery #
Use the Email Message settings to:
- Customize the subject line for the report delivery email (Merge codes can be used here to personalize the message)
- Edit the content of the message that goes out with the report

When everything looks good, don’t forget to click “Save.”
Define Evaluator Roles #
Roles reflect the subject’s relationship with each evaluator (e.g., Manager, Peer, Direct Report). The 360° report displays average scores by role. Each role requires a minimum number of evaluators, though subjects can add more.

To configure:
- Add the names of the evaluator roles you want to include
- Set the minimum number of evaluators required for each role
(Subjects can add more evaluators beyond the minimum if needed)
When finished, click “Save.”
Messaging Settings #
Workflow Branding #
Click on Messaging, Upload your logo and customize the title displayed at the top of the intake form and in emails sent to Subjects and Evaluators.

Intake Form Messaging #
Add a Welcome Message or guidance for Subjects at the start of the intake form. Provide any specific instructions to help the Subject enter their evaluator list accurately.

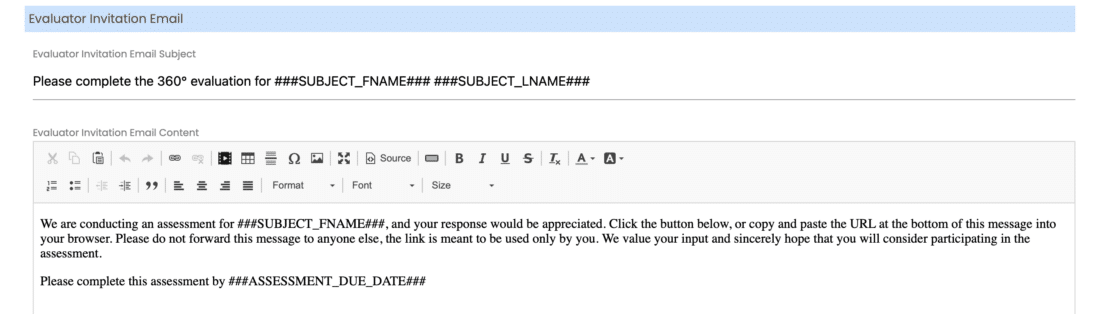
“Evaluator” Invitation Email #
- Subject Line: Customize the email subject line sent to each Evaluator.
- Email Content: Personalize the email message inviting Evaluators to complete the assessment.
“Subject” Invitation Email #
- Subject Line: Customize the email subject sent to each Subject.
- Email Content: Personalize the invitation email message for the Subject. (You can use merge codes like
###SUBJECT_FNAME###and###SUBJECT_LNAME###to insert the Subject’s first and last name automatically)

Click the “Save” button to apply your changes.
Please review the rest of the Reference Guide to learn more about our software.
Thank you for choosing Agolix!