Organize your assessment by displaying a specific number of questions per Page or by placing each question in its own Section.
When setting up your assessment, consider how you want to structure the questionnaire—especially if you’re designing a more comprehensive evaluation. For a short assessment, displaying 3 to 5 questions per Page is ideal, while longer assessments are best organized by dividing the questions into clearly defined Sections.
*Splitting your assessment by Sections will only affect how it is organized visually, not how it is scored. If you’d like to create multiple types and provide your respondent with a separate score for each type, start by creating a Multi-Type assessment and then enter your types on the “Types” tab.
Split your Assessment by Pages #
Click the “Questions” tab—by default, the “Pages” option will be selected. Enter the number of questions you would like displayed on each page in the provided field.
Click the “Randomize Questions” if you choose to randomize all the questions in your assessment. Click “Save” to store your selections.

Video Guide #

Create Engaging Assessments Using Sections (Video link opens in a new browser tab)
Split your Assessment by Sections #
Click on the “Questions” tab and select “Sections“. Using Sections allows you to present your assessment questions grouped into designated Sections. As you create your assessment, you’ll need to assign each question to the appropriate section. Any questions that aren’t assigned to a Section will automatically appear at the end of the assessment.

*For example: create 2 Sections: Demographics and Section 1. Next, add say 3 questions for the Demographic Section and 3 questions for Section 1. Your assessment will present to your respondent with the 3 Demographic questions on the first page and once answered, the next page with display the 3 questions assigned to Section 1.
Manage Sections #
Click “Manage Sections” to Edit Assessment Sections.

Edit Assessment Sections #
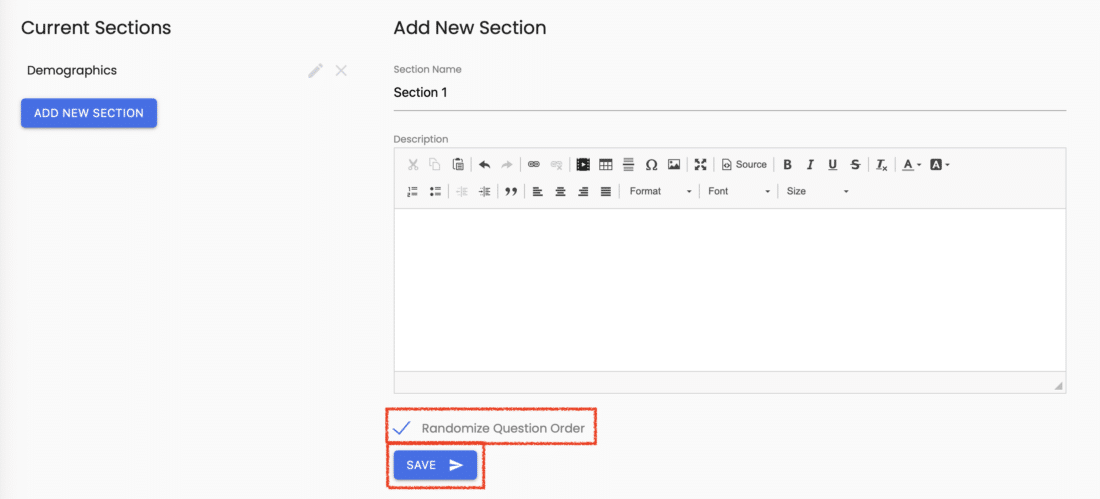
Click on “Add New Section” and enter the chosen name on the line under “Section name“. Click “Save” to save the Section name.
Your list of Section names will appear under Current Sections. In the Description Editor Window you can opt to add text explaining any Section name. The description you enter will appear in the actual assessment under the Section name.
You can also drag and drop the Section Names under the Current Sections list to re-order them.

Current Sections #
Click the Pencil to edit the Section Name. Click the X to delete the Section Name.

When you click the pencil and edit the Section, Click “Update” to update your changes.

Add Section from Questions Tab #
You can also add a Section from the “Questions” tab by clicking the “Add Section” button. If needed, you can drag and drop the Section Names here to re-order them.

Randomize Questions #
Click on “Randomize Question Order” if you would like only the questions in this chosen Section to be randomized in your assessment. Click “Save” to save your selection.
Edit Section and Add Question #
Once you’ve created a Section name, hover over the name and click “Edit Section” to make edits. Hover over “Add Question” to add a question to this chosen Section. Read more about Adding Questions to your assessment.

Collapse All Sections #
Click “Collapse All Sections” to compress and view the page more simply.

Expand All Sections #
Click “Expand All Sections” to open and view all of your Sections and the questions assigned to them. You can also drag and drop the Sections to re-order them.

Please review the rest of the Reference Guide to learn more about our software.
Thank you for choosing Agolix!