Personalize and polish your Report instantly by using our Block editor.
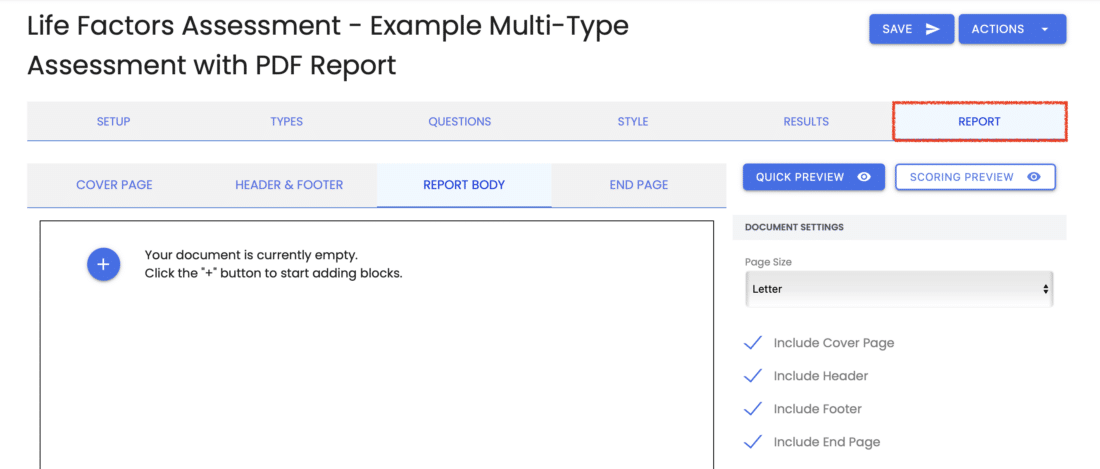
Navigate to the Report tab #
Start by entering the Agolix editor. Click the “Report” tab to begin. (If the Report tab does not appear for your assessment, then please Enable PDF Report Generation. Alternatively, you can reach the “Report” tab by clicking the “Edit PDF Report” button on the Results tab).
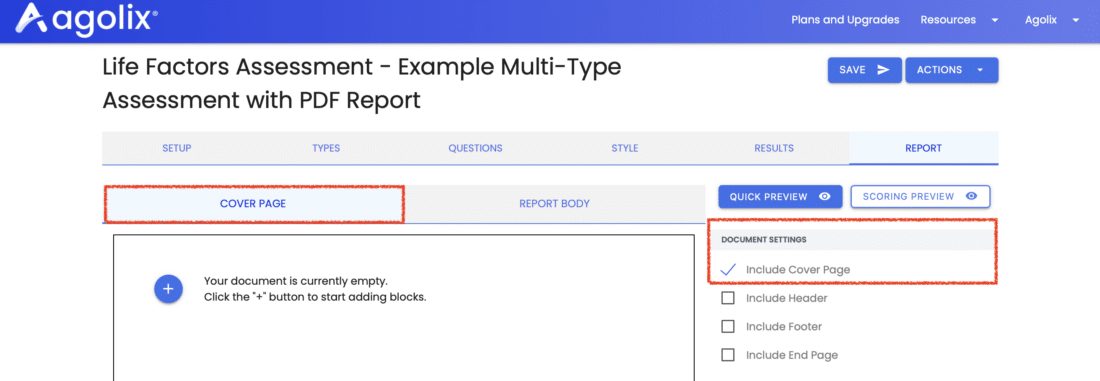
On the right hand side of your screen you will see a number of document and page settings, including the options to enable a Cover Page, Header, Footer and End Page. Leave them unchecked if you are not including them in your results report. (Note that the Basic plan only allows for Report Body content and does not include Cover page, Headers, Footers, and End page options).
Choose Page Size #
Under Document Settings, click Page Size to choose either Letter or A4 for your entire PDF Report.
The default is US Letter with dimensions of 8.5 x 11 inches (216 x 279 mm).
A4 is also available with dimensions of 210 x 297 mm (8.3 x 11.7 inches).

Include a Cover Page #
Check the Include Cover Page box under Document Settings to add a Cover Page to the front of your PDF Report.
Set Page Margins #
Under Page Settings, click Page Margins and edit the Top, Right, Bottom and Left Margins for the Cover Page.

Choose Background Image Template #
To set a background image for your cover page, click “Choose from Templates” and select from nearly 100 available options.

New assessments start with a default background cover image (that pairs with a report body background image). You can keep this default, swap it for another template, or upload your own custom image (see the section below).
Upload a Background Image #
Upload a Background image for your cover Page by clicking the “Cover Page” tab then Background under Page Settings.
Click Upload to access your image files and select the proper cover page image. There are settings to Repeat, Position and Size the cover page.
*Recommended background image size is 816 w x 1056 h pixels for US Letter and 794 w x 1120h pixels for A4.

Enter Cover Page Content #
To add content to your cover page, see Adding Content Blocks for details.
Add a Report Header #
Check the Include Header box under Document Settings to add a Header to your Report Body.
Then click on “Header & Footer” tab to access the Header settings.
Adjust Top Margin #
Set the Top Margin for your header in millimeters from the top of each Report Body page.
Enter Header Content #
Enter content as desired into the 3 horizontal header boxes. This table is provided as a guide for your header content. Different content can be entered into each block or left blank.
By default, the content for the left block is left justified, content for the middle block is center justified, and the right block is right justified.
See Editor Window Explained to learn more about the settings available in each editor window.
Enable Header Merge Codes #
Enable the Show Header Merge Codes checkbox to view the list of Merge Codes available for the Report Body Header. Merge Codes make it easy to add dynamic content to your Report Header.
Numerous merge codes are available such as First Name, Last Name, Email, Date and more. Enter a search string into the Filter merge codes field to locate a specific merge code quickly.
To add a merge code, put your cursor in the desired location and then click on the button for the merge code you want to add.

Add a Report Footer #
Check the Include Footer box under Document Settings to add a Footer to your Report Body.
Then click on “Header & Footer” tab to access the Footer settings.
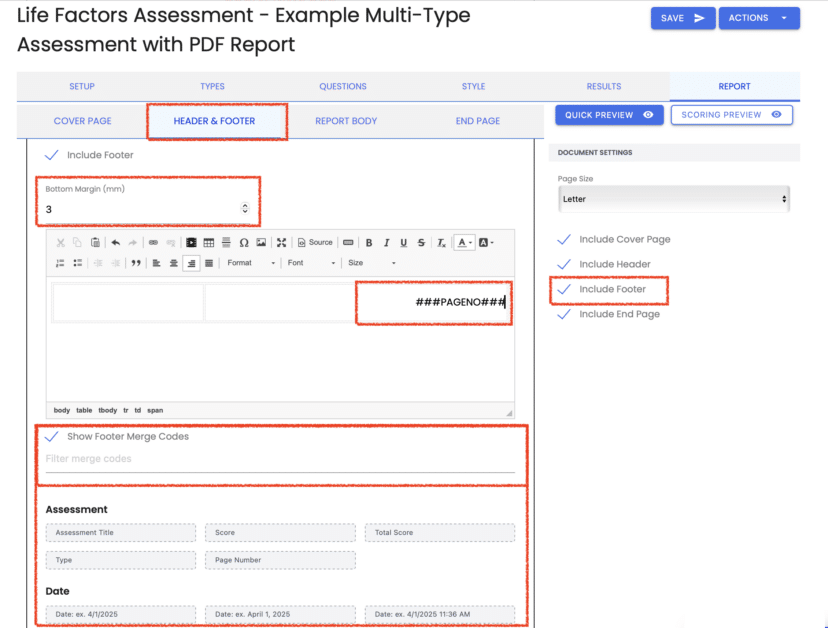
Adjust Bottom Margin #
Set the Bottom Margin for your Footer in millimeters from the bottom of each Report Body page.
Enter Footer Content #
Enter content as desired into the 3 horizontal Footer boxes. This table is provided as a guide for your footer content. Different content can be entered into each block or left blank.
By default, the content for the left block is left justified, content for the middle block is center justified, and the right block is right justified.
See Editor Window Explained to learn more about the settings available in each Editor Window.
Enable Footer Merge Codes #
Enable the Show Footer Merge Codes checkbox to view the list of Merge Codes available for the Report Body Footer. Merge Codes make it easy to add dynamic content to your Report Footer.
Numerous merge codes are available such as Assessment Title, Page Number, Date and more. Enter a search string into the Filter merge codes field to locate a specific merge code quickly.
To add a merge code, put your cursor in the desired location and then click on the button for the merge code you want to add.
Include an End Page #
Check the Include End Page box under Document Settings to add an End Page to the final page of your PDF Report.
Then click on the “End Page” tab to access the End Page settings such as Document Size, Page Margins and Background.
Upload Background Image #
Upload a background image for your End Page by clicking the “End Page” tab then Background under Page Settings.
Click Upload to access your image files and select the proper End Page image. There are settings to Repeat, Position and Size the End Page.
*Recommended background image size is 816 w x 1056 h pixels for US Letter and 794 w x 1120h pixels for A4.

Enter End Page Content #
To add content to your end page, see Adding Content Blocks for details.
Enter Report Body Content #
To add content to your Report Body, first go to the Report Body tab.
Set Page Margins #
Under Page Settings, click Page Margins and edit the Top, Right, Bottom and Left Margins for the Report Body.
Choose Background Image Template #
To set a background image for your body pages, click “Choose from Templates” and select from nearly 100 available options.

New assessments start with a default background image (that pairs with a cover page background image). You can keep this default, swap it for another template, or upload your own custom image (see the section below).
Upload Background Image #
Upload a Background image for the main section of your report by clicking on Background under Page Settings.
Click Upload to access your image files and select the proper report body image. There are settings to Repeat, Position and Size the cover page.
*Recommended background image size is 816 w x 1056 h pixels for US Letter and 794 w x 1120h pixels for A4.
Enter Report Body Content #
To add content to the body of your report, see Adding Content Blocks for details.
Save Changes #
Click the “Save” button at the top of the page to save your changes.
Please review the rest of the Reference Guide to learn more about our software.
Thank you for choosing Agolix!